My first task was to create a 3D model. Now, I do have some experience using Blender on and off over the past year or so. My background with it definitely made the process easier, although I did follow a tutorial on YouTube that guided me through. The model was made using the texture as a guide. Credit for the texture goes to Robin C. It can be found here.

Completed model in Blender software.
Once the model was complete, the texture that I was using to create the model could be applied. To do this, I followed the UV unwrapping routine to apply the image texture to the faces of each polygon. It was pretty straightforward since there are not many details in this model. In the image below, smooth shading makes the model more appealing.
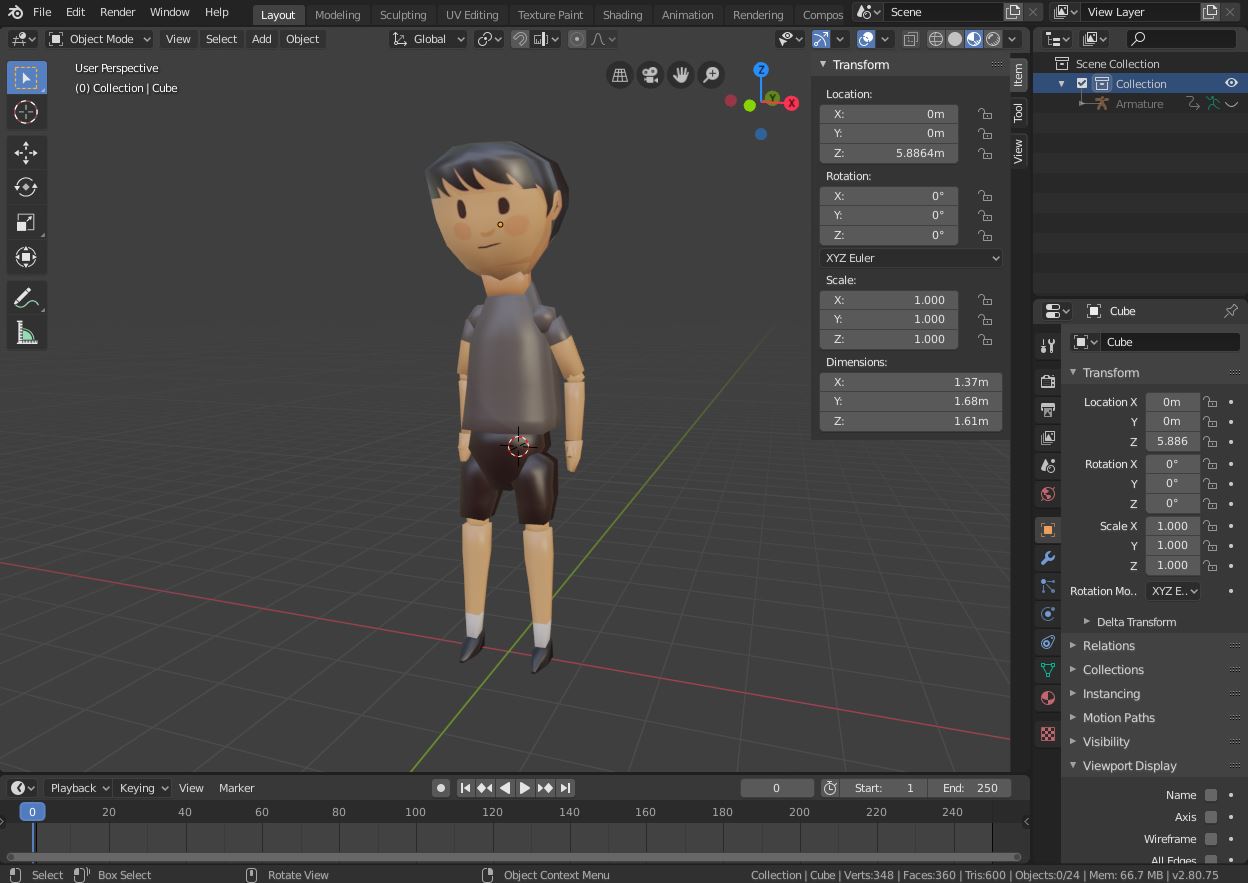
Model with texture applied in Blender.
Now that the texture has been applied, we can start "adding bones" to the polygons. Doing this is called "rigging" a model. It took some time, but again I followed a YouTube tutorial for rigging a character model. Once the "rig" is in place, I could start moving the bones around to experiment with different poses.
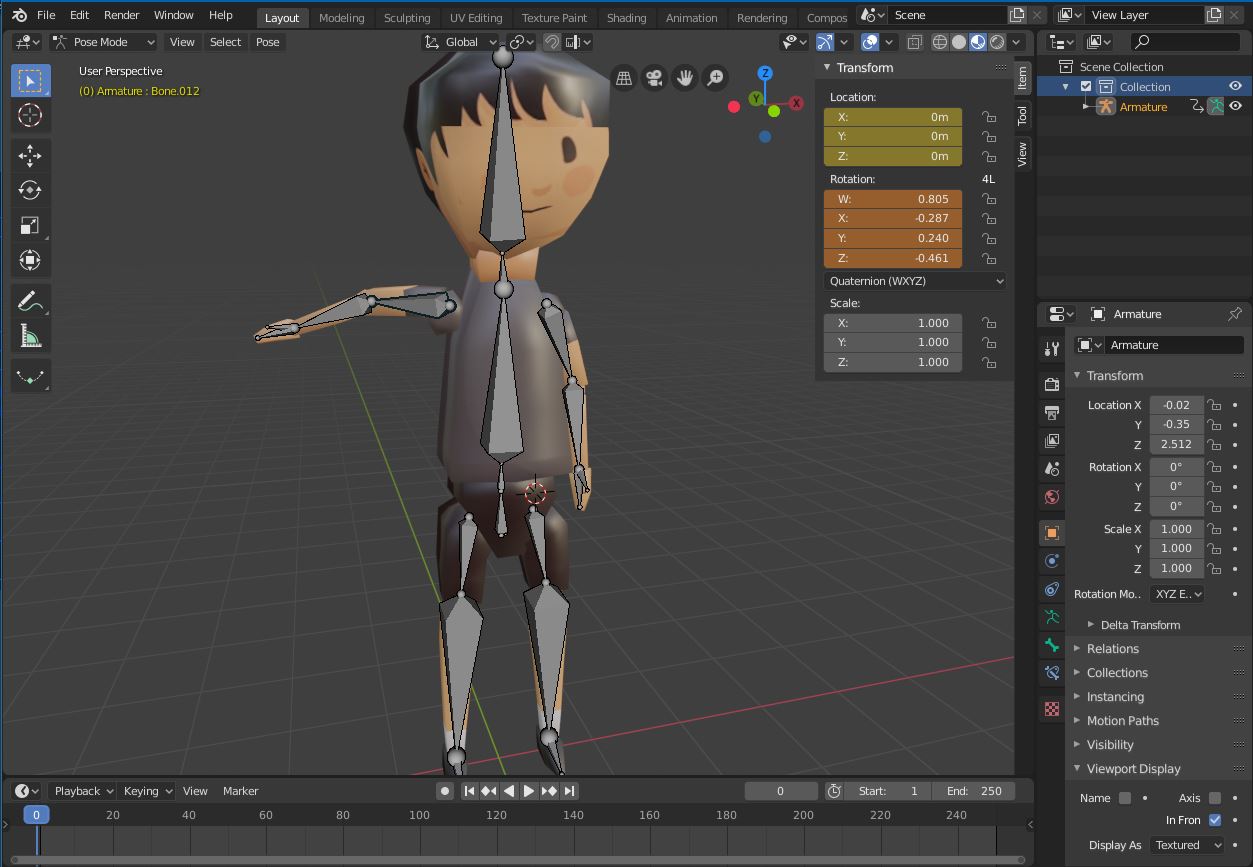
Rigged model in Blender.
Now comes the time to animate! I wanted to do a simple waving animation with some movement. So I made him sort of shift his weight onto the opposite foot and then go back to the original position. This results in a clean looping pattern.
Animating is all about adding "keyframes" over a timeline. You choose positions at certain times that the model should hit and the software will smoothly move the bones between the time for each keyframe. This is a pretty common technique and honestly pretty simple! At the bottom of this image you can see I have just 5 total keyframes. If you watch the animation it can be clearly seen when each keyframe transition occurs.
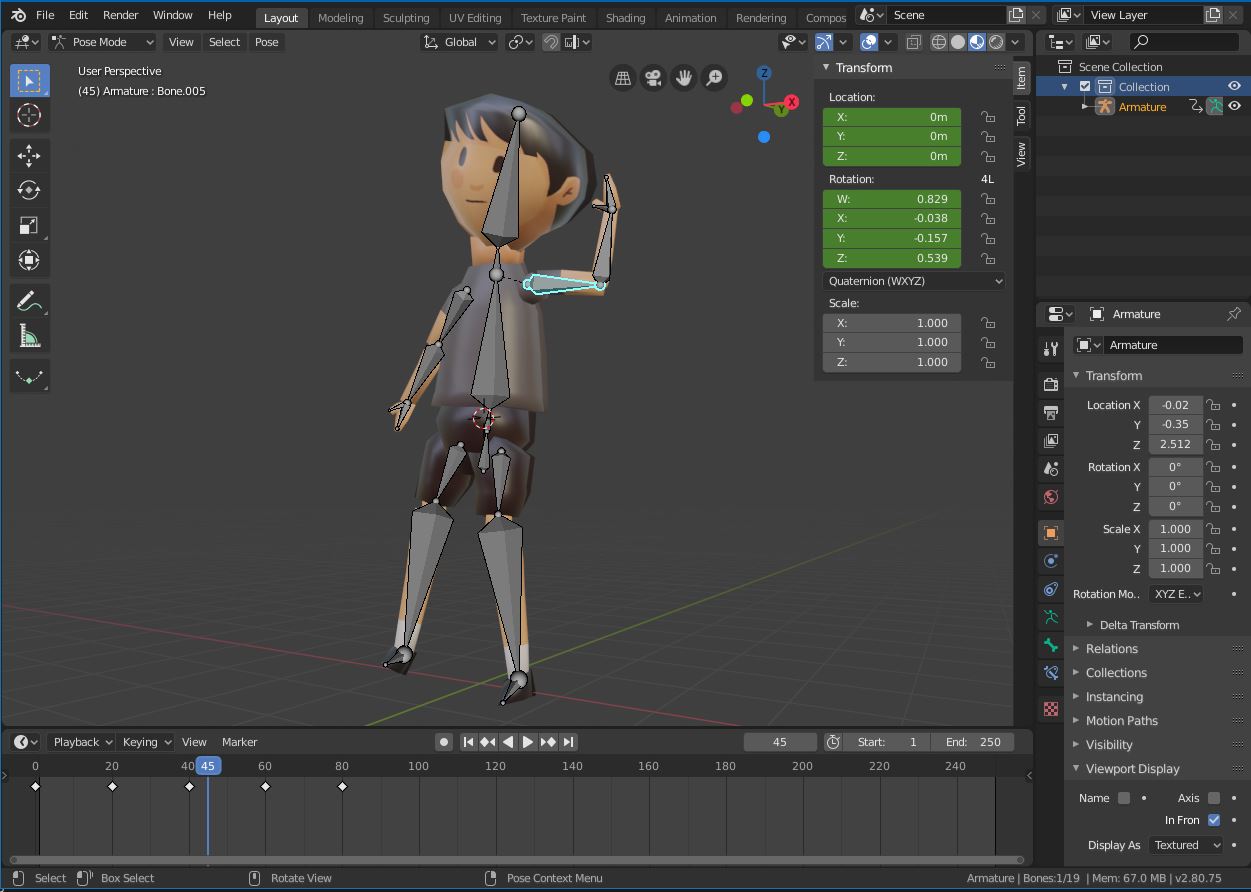
Animating the model in Blender.
Now comes the part I am best at - programming the model to work in the browser! I used a popular library called "THREE.js" to load and animate the model. I will admit that if you haven't used this library before it can be a bit intimidating. But really all you need to do is find the right examples online and search for any problems that may come about... and be prepared to spend a lot of time tinkering with the code until things work. But after an hour or so, I was able to write some decent, quick code that loads the model (as a GLTF/GLB) file and initiates the animation.
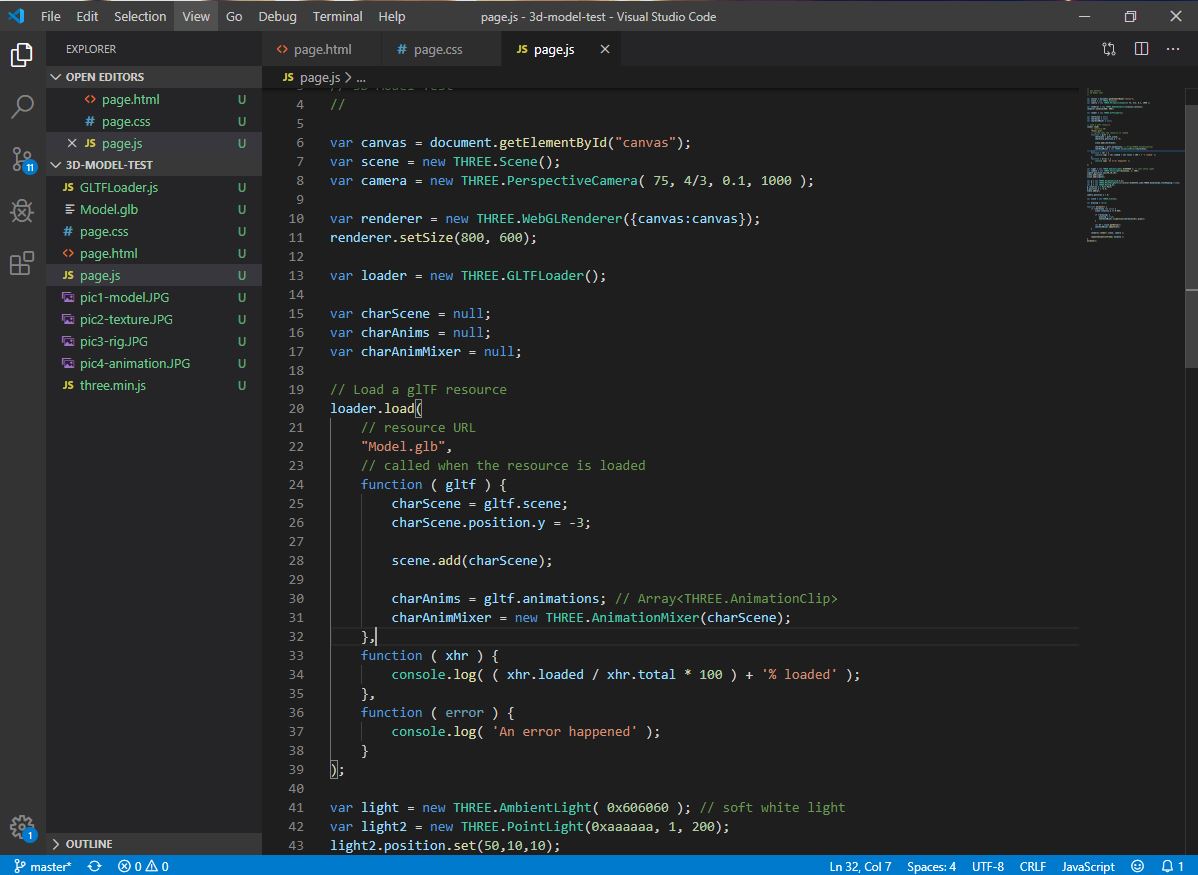
Programming in VS Code.
And now the final part, writing this blog post! I'm carefully navigating the timeline as to not cause a chicken-and-the-egg issue. The picture was taken while a bit of the post was written, but there is much more written as I actually enter the contents into the html file.
Time bending picture of the beginning of this post.
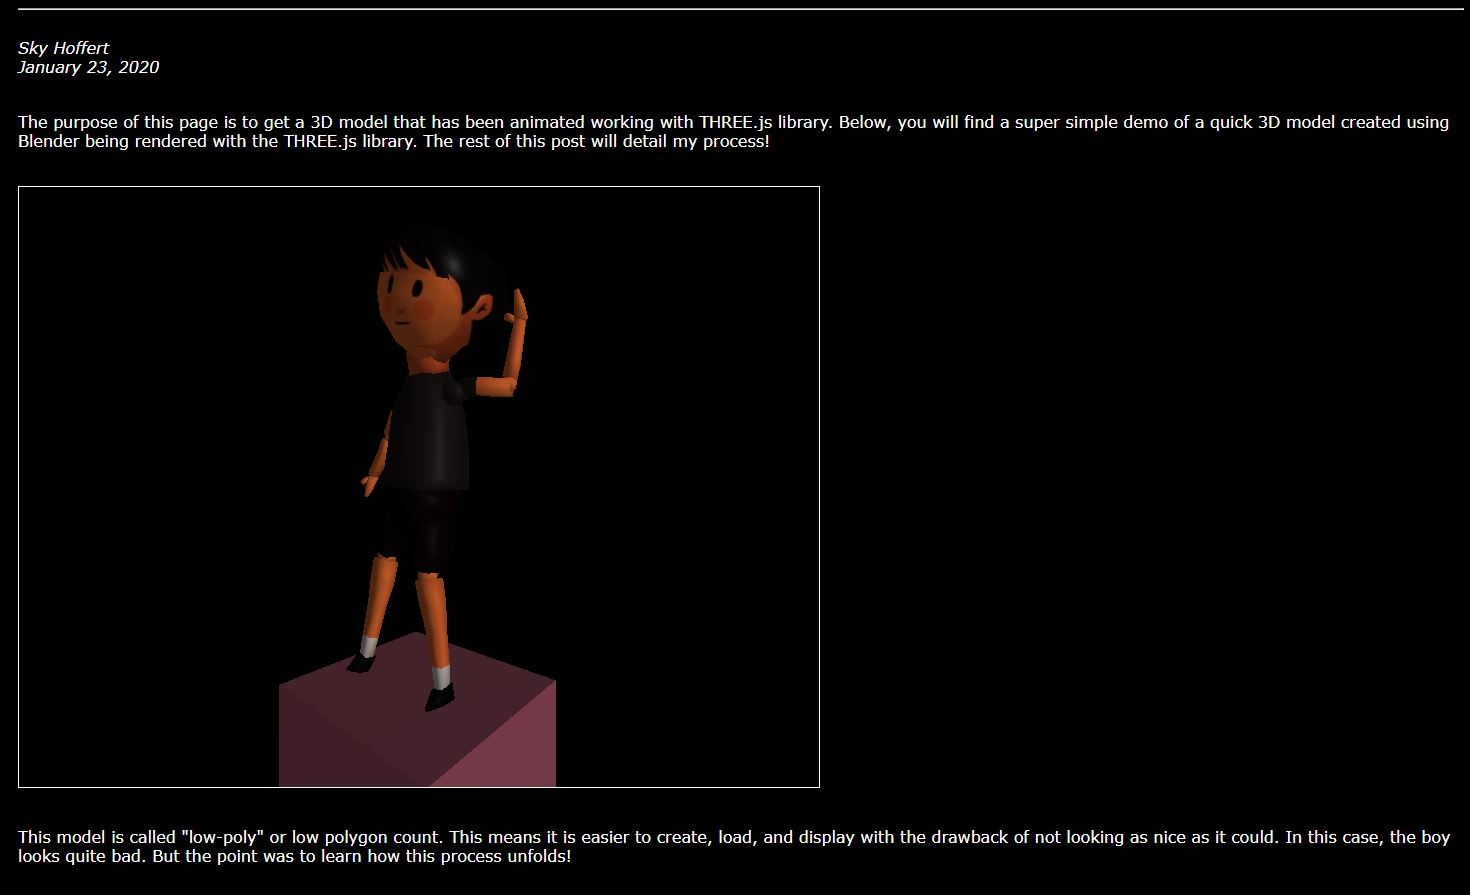
That wraps everything up! Overall this was an awesome learning experience. I would highly recommend that if you are interested in game development or modeling or anything else related to this process that you go through it to figure out for yourself how everything works. The end result is being able to watch your animation in the browser anywhere on any device. Pretty cool!
Be Curious!